December 13, 2011

December Pals Hop


Welcome to the December Pals Hop! This month, we're featuring Birthday themed cards and projects! I hope you enjoy the hop and the amazing creations that the Pals have come up with.

You've likely hopped over from the amazing Jennifer Takacs her blog can be found by clicking

HERE, I'm stop number 10 on the Pals Hop and I'm glad you hopped in! I'll help you "hop along" from blog to blog where you'll find great ideas for Birthday cards and paper projects from the Stampin' Pretty Pals! Should you hop off course, simply click on any of the links in the Pals Hop Line-up below and you'll be back on track!
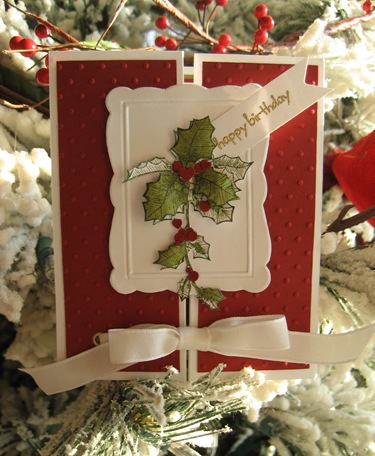
I felt there was no better way to round out the year than that of a  Christmas themed Birthday card “all tied up” and displayed on my Christmas tree ~
          009
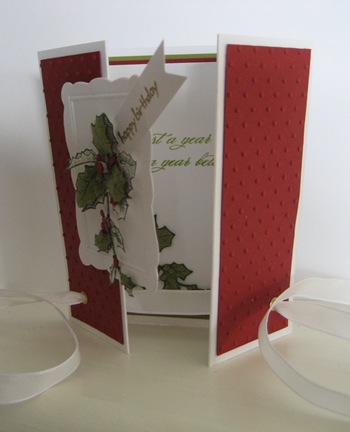
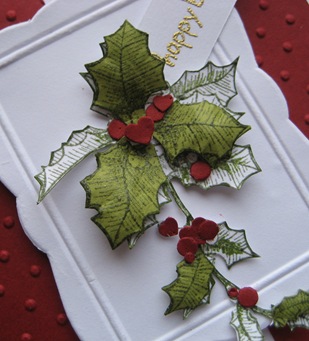
It’s a trifold card featuring one of the Designer Frames mounted with an image from the Bells & Boughs stamp set.  Together they are decked out in Cherry Cobbler, Old Olive and Whisper White with a splash of gold. 
Looking closer, you can see that a few punched hearts replaced some of the “berries”.  The image was stamped twice.  Once on Whisper White and then again on Old Olive, both times using Always Artichoke Ink. The Old Olive leaves were then snipped out and placed at the corresponding places of the leaves stamped onto the Whisper White.
                  009
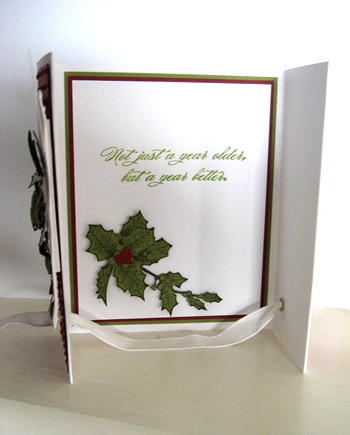
You have to untie the ribbon to be able to open up the card to view the inside.
              004
              002
A single heart rests in the middle of the leaves.
Hop along for more inspiring ideas from the very talented Julie Trevett her blog can be found by clicking HERE, stop number 11 on the December Pals Hop!
Thanks for "hopping" by!
3. Maxine Conrad at http://www.stamptothemax.com/
17. Cindy Hall at http://prettyimpact.com/
18. Benjamin Turner at http://hestamps.blogspot.com

This will be my last post for this year.  As for you, this is an extremely busy time, I'll be out of town this weekend and our Grandson is due next week.  BUT I'll be back the first of January 2012 with baby pictures in hand!
 
I wish you all a VERY MERRY CHRISTMAS and a HEALTHY HAPPY NEW YEAR

December 12, 2011

A Masculine Christmas Birthday Card

Howdy to all and happy Monday!

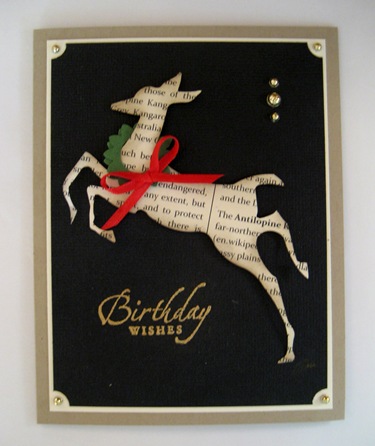
Today’s card is all about a guy having a Birthday close to Christmas.  I enjoyed making it, I hope you enjoy taking a look ~

        005

This time of the year just happens to be the peak of Deer Hunting Season.  Our friend is an avid deer hunter; hence, choosing the deer die. 

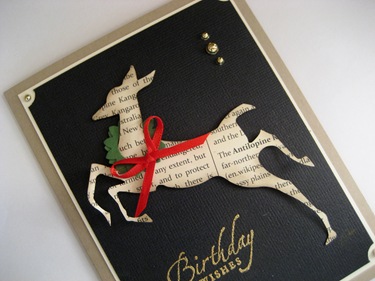
Although is doesn’t show up very well, the black cardstock is textured.  Maybe looking closer might help ~

        008

The neck wreath was punched with the Boho Blossom punch and then using the 1/2” circle punch to make the whole in the center.  I punched two and then off set each giving it a little more fuller look.  The deer was sponged with Crumb Cake Ink and the sentiment heat set with gold EP.

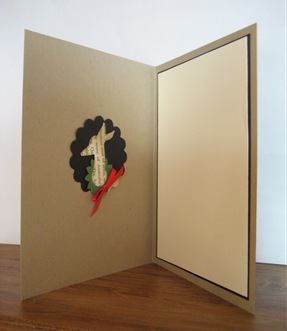
I tried to mount his head, as a trophy on the inside ~

                 007

You know I understand the need to thin out these beautiful creatures, but one look into those beautiful brown eyes and that would be it for me!

Here’s a peek at one of our beautiful brown eyed creatures…….Bodie!

         005

                     013

Thank you for stopping by I appreciate each and every visit, you all are AWESOME!!!

Tomorrow is the Pals December Blog Hop be sure to come back!

See you then….

Photobucket

Photobucket

December 08, 2011

Putting On the Ritz With Sparkle

Hello everyone and welcome to another Great Challenge  by the Pals Paper Arts Design Team – putting on the RITZ.  If you’re in need of a little inspiration, click HERE, and see all the wonderful creations made by each of the team members!

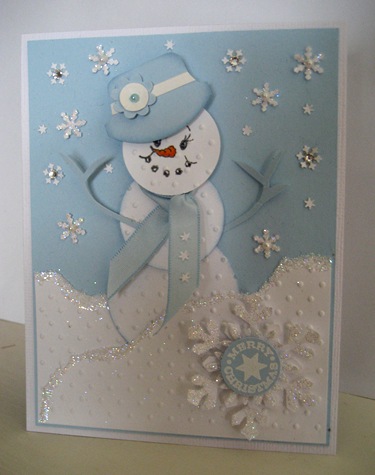
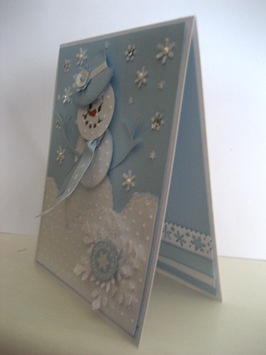
I’ve decided to enter this ritzy lady, decked out in blue with sparkle galore.

        033

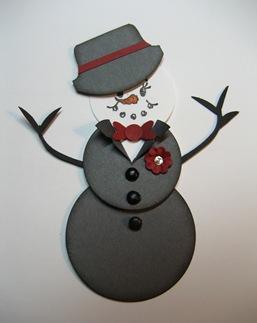
If it were not for the fact that I have just completely run out of time for today, I would have dressed this snowman up in a tux!  It wouldn’t be hard to do.  I have just run out of steam for one day. *smiles*

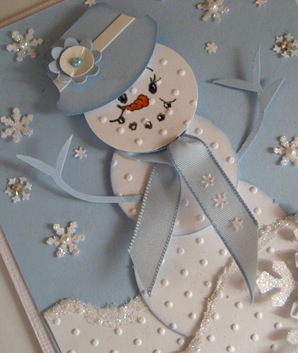
I sponged her snowball edges with Bashful Blue even her hat got a bit of sponging while the scarf came from Bashful Blue ribbon.  Her arms are the art work of Kim Score and her face is that of PK.  Dazzling Diamonds, rhinestones and basic pearls make up her Ritz and glamour.

Looking closer ~


                 009

            010

Inside ~

                     031

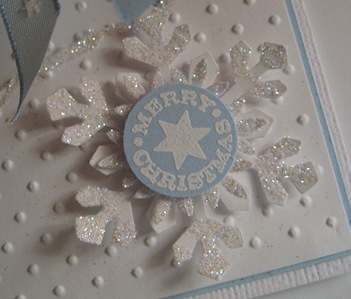
The snowflakes on the front of the card came from the border punch used inside.  They were just the right size – nothing wasted!

Since I know what card will be coming your way on Monday, I thought I would give you a sneak peek ~ I think you’ll like it!

                        007

Hmmmmmm, I’m still thinking about that snowman in a tux!  Well just get over it and give it a try!

                   036 

You’ll probably see him down the road on a card! *smile*


Thanks for stopping by – I love the company!!!

Photobucket

 Photobucket

December 07, 2011

An Ornament Christmas Card

I still haven’t completed my Christmas card list, although I can see the light at the end of the tunnel.  I’ll share them as I make them! *smiles*

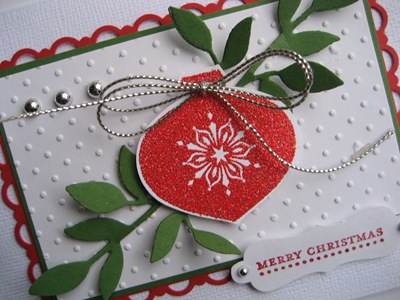
      005

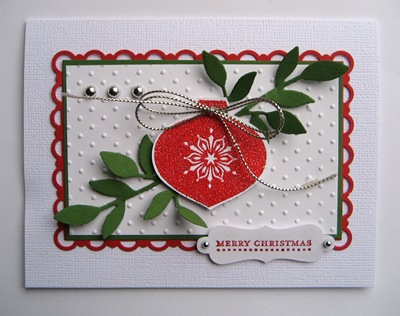
Garden Green, Whisper White, Real Red with a splash of silver help make up today’s card.  The Scalloped Border punch, Little Leaves die, Ornament punch and the Decorative Label punch were the tools used.

For sparkle, I stamped the ornament image with Versa Mark and then applied a liberal amount of red glitter EP.  Check it out ~

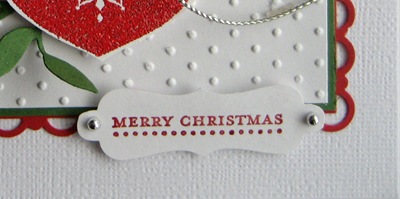
       006

I downsized my Decorative Label punch to accommodate the Merry Christmas sentiment nicely and popped it up with dimensionals.

       003

Kept the inside clean and simple ~

                      002

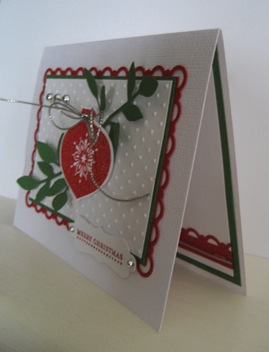
I, also, brought my borders in smaller on this card.  I felt like it made
the focal point a little more distinctive. 

I have got a couple different cards made to share with you all.  But I can’t for the life of me make up my mind which to use for tomorrow BLACK or BLUE ?????

Have a good one everybody and as always ~

 THANK YOU FOR STOPPING BY!!!

Photobucket

 Photobucket

December 05, 2011

PPA 122–Celebrity Color Challenge

Here are the colors that the Pals Paper Arts Design Team are challenging you to use.

        Ppa color

These are my favorite colors for this time of the year, you know I had to play!  Won’t you join in on the fun by clicking Here to submit your entry?

Here’s my card, clean and simple ~

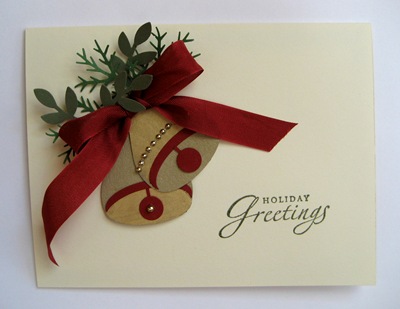
        024

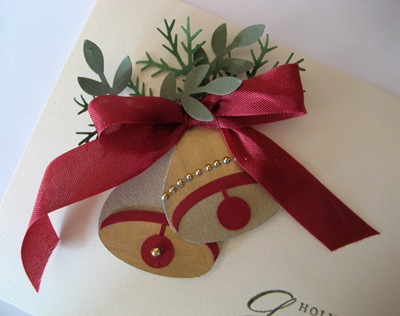
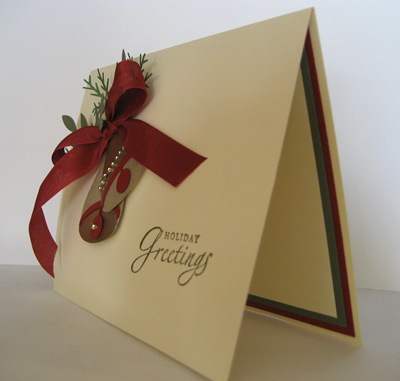
The bells are made using the Blossom Petals Builder, just snip off the scalloped edge of the large petal.  Used my oval punch for the underneath inside of the bell look.  Used my Brushed Gold paper and Gold leaf pen for contrast on each bell.  Of course the sentiment was stamped then heat set with clear EP.

Looking a littler closer ~

        019

Inside ~

      016

At this angle you actually have a better view of the 3D effect that the bells have.  I sincerely appreciate the Design Team Members of the PPA for such an inspiring challenge.

Okay I am back on the mend thanks to all the good advice from my good friend Dona!  We’ll now look at a rather lengthy healing time and then on to an implant – with the tooth, of course!  LOL

Have a good one everybody and I’ll see you here tomorrow, I’d give you a sneak peek, but I haven’t made the card yet.  *smiles*

Thanks For Stopping By ~

Photobucket

 Photobucket

December 01, 2011

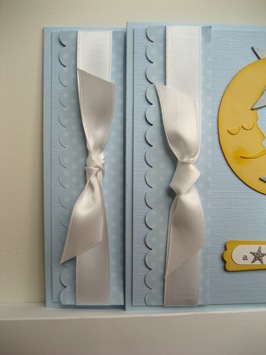
Baby Announcement & Making a Knot Bow

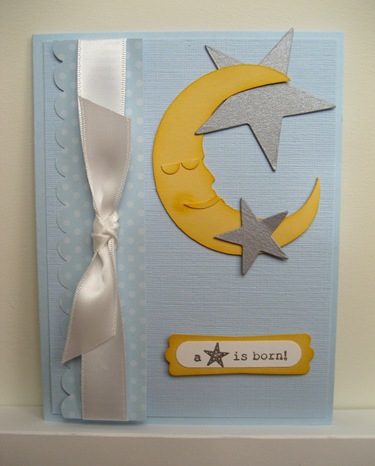
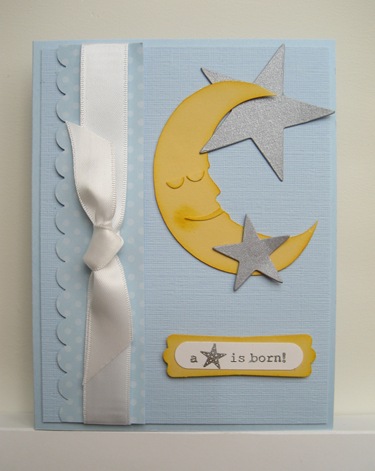
I have been busy making announcements for the arrival of our new Grandson.  Jacob William is due on December 22nd, so you know where I’ll be on Christmas! *smiles*  This particular card called for a, what I call a Bow Knot.  Believe it or not I can’t make one to suit me.  Check it out!

          001

I was sharing that with my good friend and buddy – Carla Bazhenow, please check out Carla’s masterpieces HEREShe in turn sent me to the very talented Mary Fish for a GREAT VIDEO tutorial which can be found HEREJust in case the video link doesn’t work, go to Mary’s blog and click on Tutorial Library.

Thank You Carla!!!
&
Thank You Mary!!!

With that said here is my new bow – redone on all the cards!

          010

Can you see the difference?  Here’s a better comparison.

                     006

You have gotta love blogging!  Everything I know has been through the wonderful world of BLOGLAND, and I thank all of you who has taught me so well!!!

I’m having a tooth extracted today so I’ll not be posting until Monday.

  Have a GREAT WEEKEND everybody and happy stamping!!!

“24 days until Christmas”

Photobucket

 Photobucket

November 30, 2011

Love Birds

I’m sure you all are familiar with Kim Score and her blog ‘Paper Punch Addiction’.  I have been so fortunate to have been showcased on her blog so many times that I needed to share some love in return! 

THANK YOU Kim! 

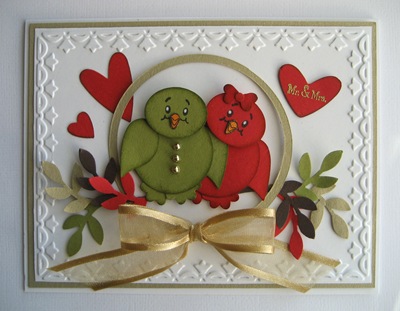
I believe Kim is one of the craftiest people around, I happened to need an Anniversary card coming up in December and noticed her ‘love birds’ they are so SWEET!  Her directions can be found HERE.

        028

I did add the girly bow and buttons down his chest.  Faces are from the Peachy Keen Stamps collection.  Mr. & Mrs. was heat embossed with gold powder on a heart punched from Real Red with edges sponged in Cherry Cobbler Ink.  The leaf from the Two Step Bird Punch provides their nesting place.

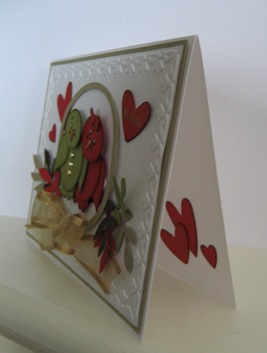
Looking closer ~

         027

A couple more hearts on the inside ~

                       025

That’s all the love I have for today!  Be sure to visit Kim and as always thanks for stopping by!!!

Photobucket

 Photobucket

November 29, 2011

Pinecone Tutorial

Hello to all my stamping friends!  I trust everyone had a GREAT Thanksgiving and took full advantage of all the Black Friday deals.  You can bet that I sure did…lol – it’s one reason I haven’t posted lately.  I just don’t know how you all manage to cook, shop and keep your blogs up all at the same time.  My hat’s off you each of you that do!!!

My morning has been dedicated to working on this tutorial for all of you that asked for it, I did the best I could, if a question comes up or I didn’t make something very clear, you know I’m just a click away.

Step 1

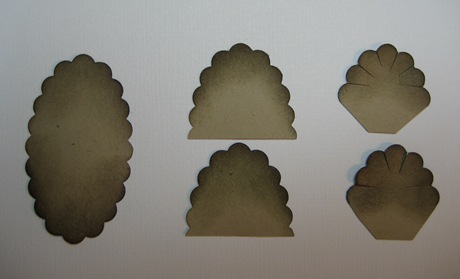
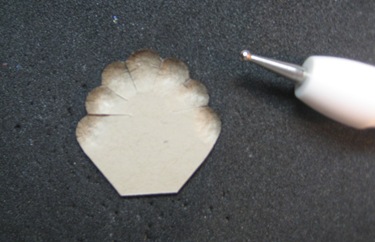
Using Crumb Cake punch six scalloped ovals.  Using Crumb Cake Ink distress the edges on each end of the ovals.  Using Early Espresso Ink distress again the same edges on each end of the ovals, restricting to just the very edge.  As pictured in the first oval below.

Step 2

Cut each oval in half and snip off the outside bottom edges.  The width of your pinecone depends on how much of the outside bottom edges you cut off.  If you want a small more narrow pinecone, trim off more.

Step 3

Make tear shaped snippets in the valley of each scallop.  As pictured in the third scallop.
004

Step 4

Using your Mat Pack – on the BACK side of each scallop,work a stylus over each and every scallop WELL.  You need to break down all the fibers in these areas. 
         005

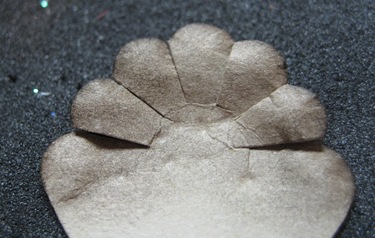
Turn over and you can see how it begins to take on the resemblance of a pinecone.  On this side push your stylus in at the base of each one of those tear drop shaped cuts….
          006

watch your pinecone pop up with a 3D effect.  The more you push in with the stylus the more 3D you’ll have.

Place a glue dot in the center of five of the pieces, leave one without – this one will be put on last.
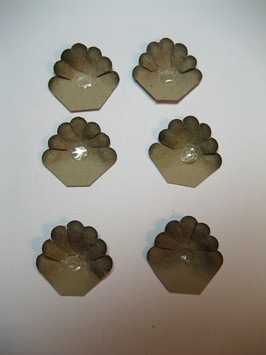
                       008

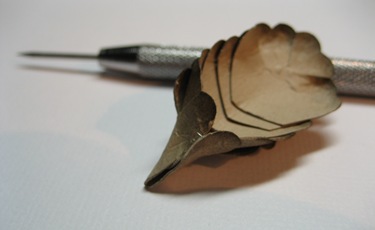
I forgot to do that and had to pull one glue dot off.  Now layer one on top of the other.  With the last piece in place, I just kind of pinched the bottom together and adhere with another glue dot so that it stays together at the bottom.
          012

Now just sit back and play with it.  I take my pick and lift different edges upwards…..anything you like that will give it some realistic shape.
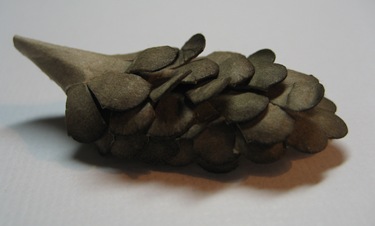
          010

Dazzling diamonds added on the edges might be a nice touch. *smile*

Now just nestle your pinecone in with some leaves and a ribbon and your set!

Here’s an idea -  I purchased an Olive Garden Gift Certificate for a Thank You Gift.  I didn’t realize that it would be enclosed in such a nice card already made.  I thought I was going to just get the card itself.  Well this is what I did with it to make it a little more personable.
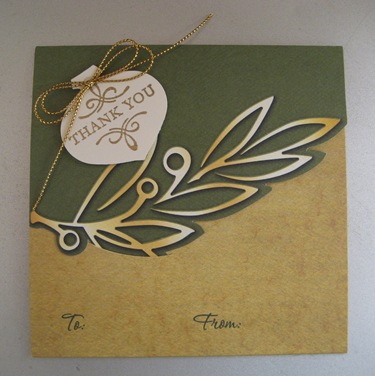
         002

I stamped the ‘Elegant Thank You’ image onto Very Vanilla CS, heat embossed it with gold, punched it out with the ornament punch and added the ribbon.  How easy was that!
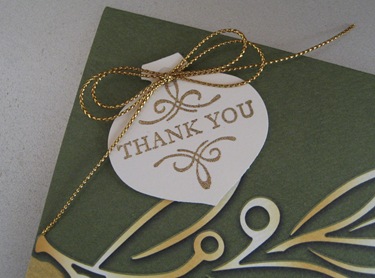
          003

I hope this answers your questions on the pinecone.  I sometimes have a hard time explaining myself, just because I know what I’m doing, I think everyone else does too.  *smiles*  Let me know if you get stuck along the way. 

Have a good one – See you tomorrow!
&
Thanks a bunch for stopping by!

Photobucket

 Photobucket

Related Posts Plugin for WordPress, Blogger...