November 30, 2011

Love Birds

I’m sure you all are familiar with Kim Score and her blog ‘Paper Punch Addiction’.  I have been so fortunate to have been showcased on her blog so many times that I needed to share some love in return! 

THANK YOU Kim! 

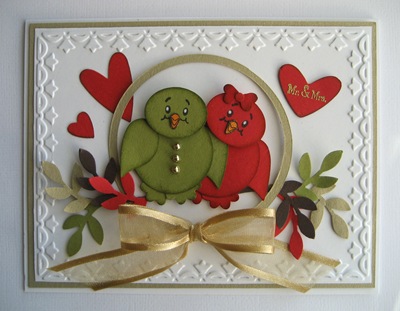
I believe Kim is one of the craftiest people around, I happened to need an Anniversary card coming up in December and noticed her ‘love birds’ they are so SWEET!  Her directions can be found HERE.

        028

I did add the girly bow and buttons down his chest.  Faces are from the Peachy Keen Stamps collection.  Mr. & Mrs. was heat embossed with gold powder on a heart punched from Real Red with edges sponged in Cherry Cobbler Ink.  The leaf from the Two Step Bird Punch provides their nesting place.

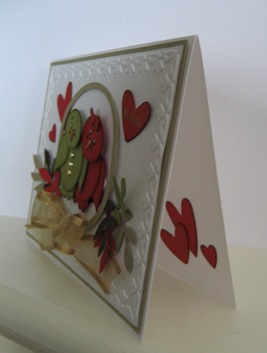
Looking closer ~

         027

A couple more hearts on the inside ~

                       025

That’s all the love I have for today!  Be sure to visit Kim and as always thanks for stopping by!!!

Photobucket

 Photobucket

November 29, 2011

Pinecone Tutorial

Hello to all my stamping friends!  I trust everyone had a GREAT Thanksgiving and took full advantage of all the Black Friday deals.  You can bet that I sure did…lol – it’s one reason I haven’t posted lately.  I just don’t know how you all manage to cook, shop and keep your blogs up all at the same time.  My hat’s off you each of you that do!!!

My morning has been dedicated to working on this tutorial for all of you that asked for it, I did the best I could, if a question comes up or I didn’t make something very clear, you know I’m just a click away.

Step 1

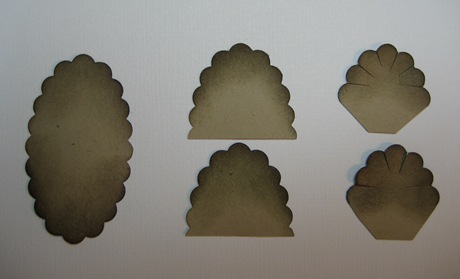
Using Crumb Cake punch six scalloped ovals.  Using Crumb Cake Ink distress the edges on each end of the ovals.  Using Early Espresso Ink distress again the same edges on each end of the ovals, restricting to just the very edge.  As pictured in the first oval below.

Step 2

Cut each oval in half and snip off the outside bottom edges.  The width of your pinecone depends on how much of the outside bottom edges you cut off.  If you want a small more narrow pinecone, trim off more.

Step 3

Make tear shaped snippets in the valley of each scallop.  As pictured in the third scallop.
004

Step 4

Using your Mat Pack – on the BACK side of each scallop,work a stylus over each and every scallop WELL.  You need to break down all the fibers in these areas. 
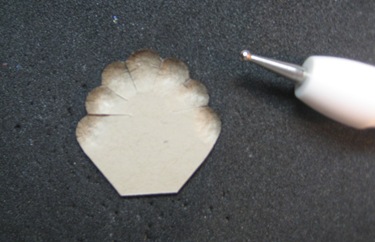
         005

Turn over and you can see how it begins to take on the resemblance of a pinecone.  On this side push your stylus in at the base of each one of those tear drop shaped cuts….
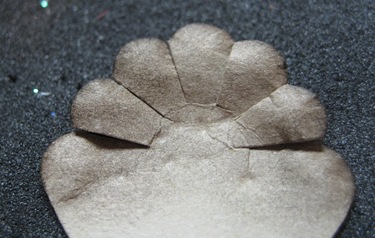
          006

watch your pinecone pop up with a 3D effect.  The more you push in with the stylus the more 3D you’ll have.

Place a glue dot in the center of five of the pieces, leave one without – this one will be put on last.
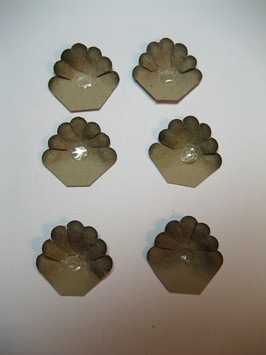
                       008

I forgot to do that and had to pull one glue dot off.  Now layer one on top of the other.  With the last piece in place, I just kind of pinched the bottom together and adhere with another glue dot so that it stays together at the bottom.
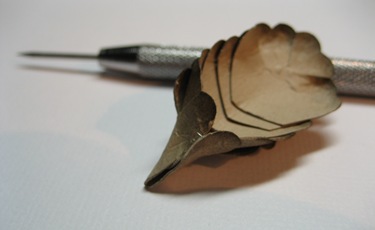
          012

Now just sit back and play with it.  I take my pick and lift different edges upwards…..anything you like that will give it some realistic shape.
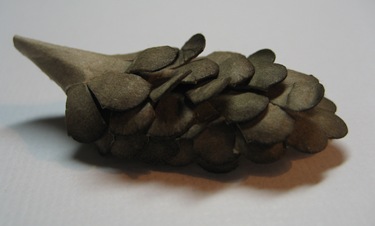
          010

Dazzling diamonds added on the edges might be a nice touch. *smile*

Now just nestle your pinecone in with some leaves and a ribbon and your set!

Here’s an idea -  I purchased an Olive Garden Gift Certificate for a Thank You Gift.  I didn’t realize that it would be enclosed in such a nice card already made.  I thought I was going to just get the card itself.  Well this is what I did with it to make it a little more personable.
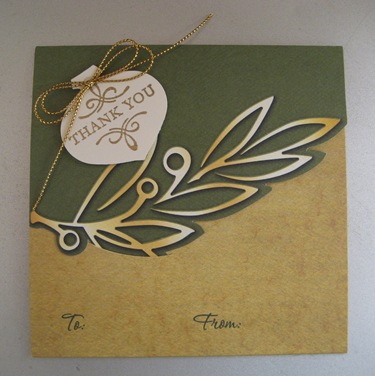
         002

I stamped the ‘Elegant Thank You’ image onto Very Vanilla CS, heat embossed it with gold, punched it out with the ornament punch and added the ribbon.  How easy was that!
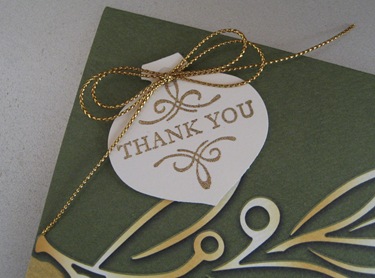
          003

I hope this answers your questions on the pinecone.  I sometimes have a hard time explaining myself, just because I know what I’m doing, I think everyone else does too.  *smiles*  Let me know if you get stuck along the way. 

Have a good one – See you tomorrow!
&
Thanks a bunch for stopping by!

Photobucket

 Photobucket

November 16, 2011

A Clean & Simple Christmas Card

I spent a little time before posting this card trying to find a challenge that it would qualify for …….. their were none.  I was a little disappointed, I thought maybe this card was worthy of at least one.  Better luck next time! *smiles*

007

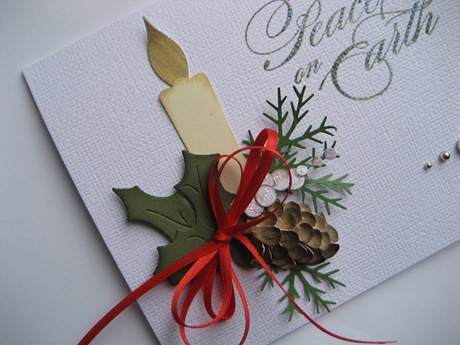
I went to a yard sale recently and found this great find sitting all by itself on a table…..it quickly became my inspiration for today’s card.  Do you by any chance recognize it?  I’ll give you a hint, the date on the box is 2007.

        009

The set was called ‘Keep Christmas’

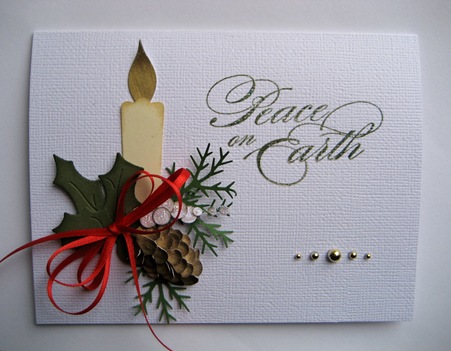
I think I did a pretty good job of casing it, if I say so myself! *smile*  I couldn’t quite get the dripping of the candle, so I settled just for the distressed edging.  The candle was created with the Modern Label punch and it’s flame created with the Blossom Petals Builder punch.  The sentiment was inked with Versa mark and then stamped with Always Artichoke and heat embossed with clear EP. 

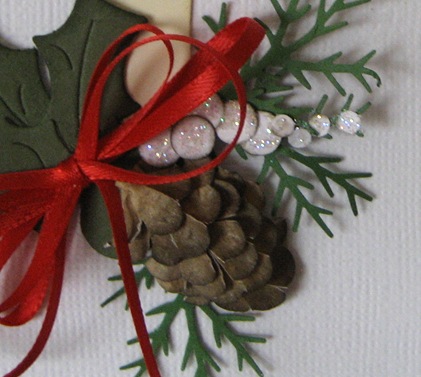
Have a closer look ~

008

I tried to again make my own pine cone.  Much better satisfied with this one.  It’s made with the scalloped oval punch and a lot of sponging on the edges.  The small white berries were sponged with Crumb Cake and dusted with Dazzling Diamonds.

    005

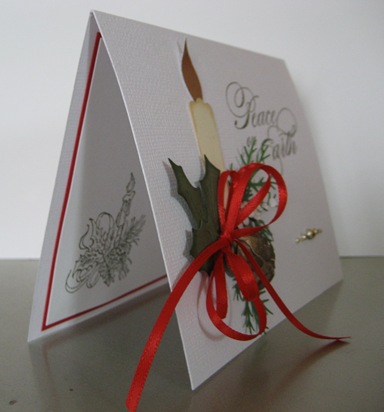
To bring the stamp into the card, I placed it on the inside ~

        006

I wonder if anyone will put the two together?  *smiles*

This may be my last posting for this week, Thanksgiving only a week away, the kids are all coming home, so there’s lots to prepare for.  I try making lists of all I need to do, but somehow I always manage to loose the lists!!!     CAN’T WIN!     I sometimes fumble at multi-tasking! l0l

One thing for sure,

THANK YOU FOR VISITING, I SINCERELY APPRECIATE EACH ONE!

Photobucket

 Photobucket

November 15, 2011

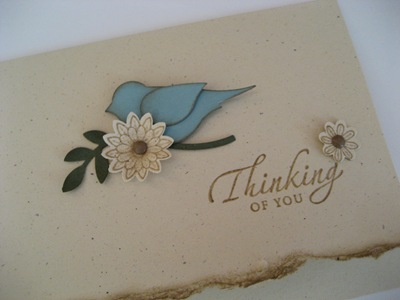
Thinking Of You

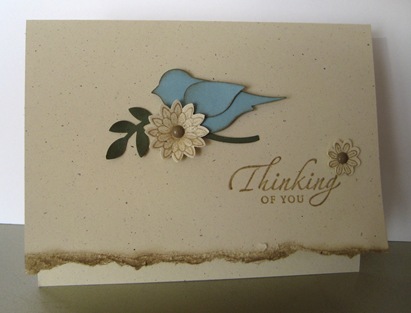
Someone had made a card very similar to this one recently.  I have no idea who it was or even where I saw it.  If anyone should recognize it’s similarity let me know, I would love to give credit where credit is due. I changed things up to reflect my taste.

For me, this card is so simple and sweet  and could be used for several occasions.  The best thing….it’s only minutes to make!

      003 

Of all my punches I think that the Two Step Bird punch is my favorite, I use it all the time. 

The flowers are from the Language Friendship stamp set.  I’m not a spritzer person but I have found that the Natural Ivory cardstock can satisfy my spritzing needs.  And you could never tire from the use of Baja Breeze and Crumb Cake together.  Both bird and leaf edges are sponged with Crumb Cake ink.  Flowers and sentiments were stamped with the same ink just heat embossed with clear EP.  I tore off the bottom edge and distressed this edge with more of the same ink.

Here is a closer look ~


        005

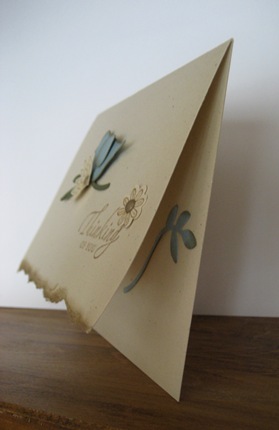
Inside ~

                   007

A simple card without all the horns, bells and whistles can still make a statement and come across just as pretty. *smiles*

I’m excited about my card for tomorrow!  It’s not quite finished so I can’t give you a sneak peek, but trust me I think you’ll like it!  Be sure to come back!!!

Photobucket

 Photobucket

November 14, 2011

A Fall Card

A huge HELLO to all my stamping friends and a Happy Monday!
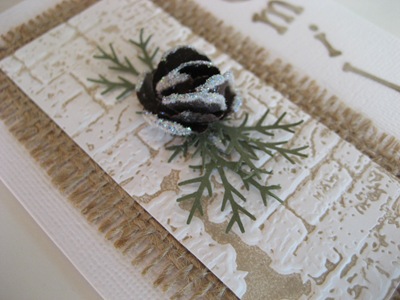
I had made this card sometime ago and forgot about it….DUH!  I had placed it with a batch of cards that I had already posted and it became - out of site and out of mind! Oh those days seem to be getting closer and closer!  *smiles*
          001

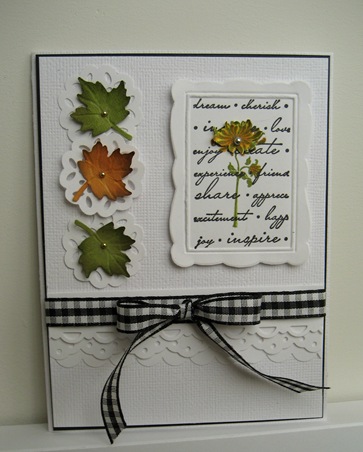
I found that the script image from the Charming stamp set fits perfectly inside this Designer Frame Embossing Folder.  That didn’t seem to be enough so I added the flower from the Bella Bloom set.

Pulling in the Old Olive Ink from the flower I punched a couple oak leaves from the Old Olive and Pumpkin Pie cardstocks inking the edges with the corresponding inks.  Each leaf was mounted on a small doily.

Under the ribbon I used a row of border punches – Scalloped Edge, Eyelet and the Scalloped Trim.

For a closer look ~

       004

It doesn’t show up very well, but I stamped the flower twice.  Once inside the Designer Frame and then again on scrap paper, colored it with SU! markers and then cut it out and popped it up with dimensionals.  The middle leaf was also popped up with dimensionals.

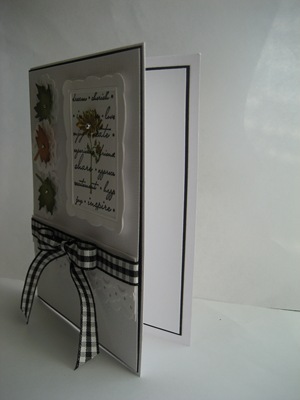
A plane and simple inside ~

                 007

I’m sure everyone is getting busy for the Holiday preparations, Thanksgiving is only a little more than a week away and then it’s time to plug in Christmas!  I just purchased my turkey and ham! *smiles* 

Thank you so much for taking the time for a visit, I know how busy you all are!

  Here’s a peek at tomorrows card….I think you’ll like it ~

                      016

Photobucket

 Photobucket

November 10, 2011

More Warm Winter Wishes

I was on a roll with the Dazzling Diamonds and Rhinestones the other day, so I just kept going with another winter card.  

This one is all about Bashful Blue ~

        003

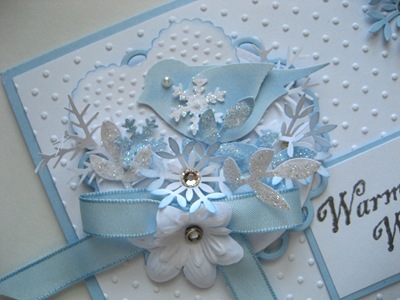
This sweet little birdie is nestled in a bed of snowflakes, glitter, pine and winter white flowers, perched just in front of a heart from the Heart of Hearts die.  All leaves and snowflakes were distressed with Bashful Blue Ink and dusted with Dazzling Diamonds.  The bird’s edges were distress with the help of White Craft Ink.

Have a closer look ~

        009

Of course a couple rhinestones were added for that extra bit of bling.  *smiles*  In order for the heart to be a little more distinctive,  I distressed it’s edges with more Bashful Blue Ink.

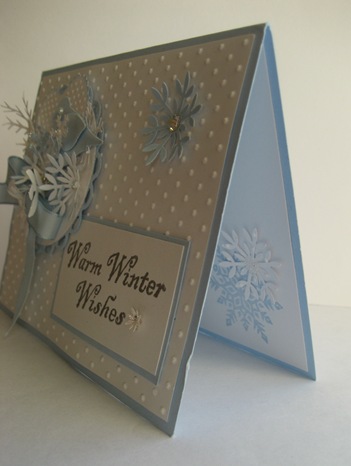
And the inside ~

            021


I’m so glad you stopped by….I sincerely enjoy each and every visit!

Photobucket

 Photobucket

November 08, 2011

November Pals Hop

Good Morning Everyone and WELCOME to the November Pals Hop!

This month, we're featuring Winter, Christmas, and Hanukkah inspired cards and projects! Won’t you take a minute to enjoy the hop and get inspired by the amazing creations that the Pals have come up with for your next project.

You've likely hopped over  from the AMAZING Ann Schach of http://www.stampinchic.com/ I'm stop number 14 on the Pals Hop and I'm glad you hopped in! I'll help you "hop along" from blog to blog where you'll find great ideas for Winter, Christmas, and Hanukkah paper projects from the Stampin' Pretty Pals! Should you hop off course, simply click on any of the links in the Pals Hop Line-up below and you'll be back on track!

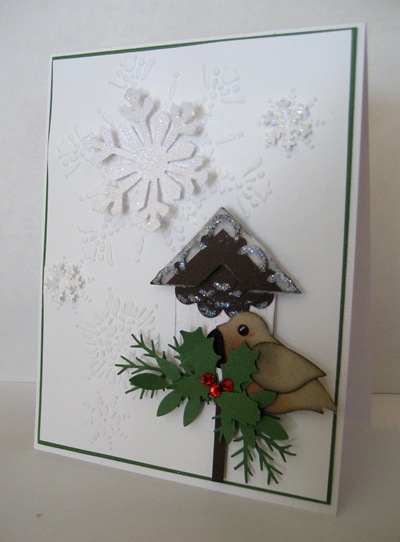
Since I have done a few Christmas cards I thought I would switch gears and make a card reflecting the Winter Season.

      099

      006

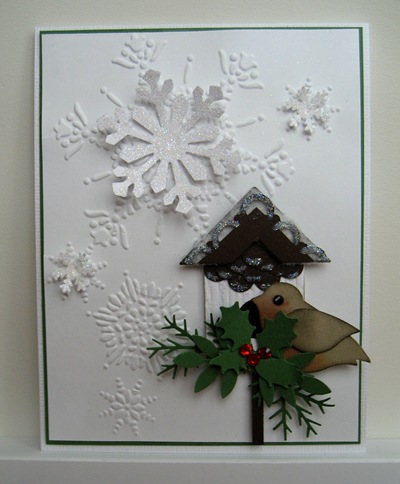
Dazzling Diamonds gives me all the sparkle that snow has to offer with the Snow Burst EF supplying the background.  The little birdie and house are made using the following:

  • Scalloped Trim Border Punch
  • Scalloped Circle Punch
  • Wood Grain Textured Plate
  • 1/2’ Circle Punch
  • Photo Corner Punch
  • Two Step Bird Punch
  • Little Leaves die
  • W. White, C. Cake, E. Espresso, Black and G. Green Cardstock


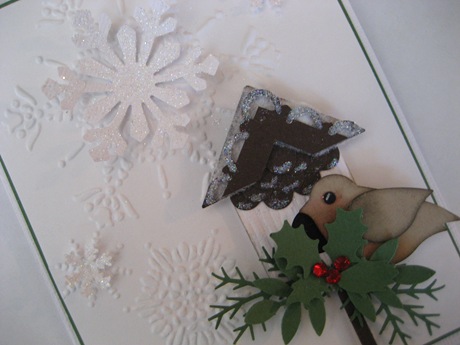
A Closer look ~

 005

I’m thinking this card would warm someone’s heart on a cold wintery day! What do you think?

Your next stop is the very talented Sandie Conner of http://www.prettyprovisions.com/.

Below is a list of the Hop line-up.  If you should loose your place for one reason or another, simply click on any one of the following hoppers and you’ll be back on track.

1. Nina Dee at http://www.deesignsbyninadee.blogspot.com/

2. Julie Trevett-Smith at http://www.thestampinaffair.com/

3. Maxine Conrad at http://www.stamptothemax.com/

4. Jessica Ying at http://www.yoyostamping.com/

5. Mike Funke at http://stampin-style.typepad.com/stampin-style/

6. Jennifer Takacs at http://www.stampinup.net/esuite/home/jenntakacs/blog

7. Nancy Gleason at http://www.stampinup.net/esuite/home/mystampinspace/blog

8. Nicole Watt at http://www.impressionsbynicole.com/

9. Mikki Sarkisyan at http://www.mikkiscreativecorner.blogspot.com/

10. Kylie Nicolosi at http://www.kyliescraftycorner.blogspot.com/

11. Mary Fish at http://www.stampinpretty.com/

12. Barb Furlong at http://www.theloveofstamping.com/

13. Ann Schach at http://www.stampinchic.com/

14. Linda Fisher at http://lindas-stampinloft.blogspot.com/

15. Sandie Conner at http://www.prettyprovisions.com/

16. Cindy Hall at http://prettyimpact.com/

17. Rae Harper at http://wildwestpaperarts.com/

18. Angie Blake at http://www.angiesmusings.com/

19. Kris Kilcoyne at http://kweenbee.typepad.com/

20. Camila McManus at http://www.obxscrapbook.wordpress.com/

21. Leah O'Brien at http://www.leahsstampincorner.com


Thank you for stopping by, I hope you enjoyed your stay!

Photobucket

 Photobucket

November 07, 2011

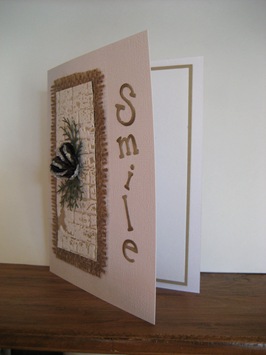
Pine Cone and a Smile

Hello to all my stamping friends, Happy Monday!  I hope your weekend was as good as mine! *smiles* How many of you forgot to set your clocks back?

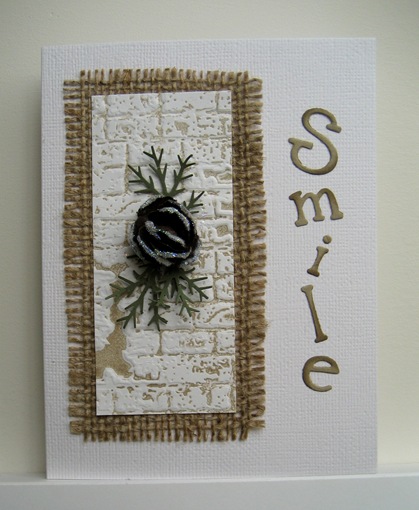
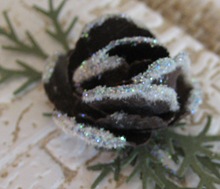
I’ve been seeing pine cones in the stores recently and got me to thinking……can I make one?  Don’t laugh……..*smile*!

      001

I only put one on because with three it become more like a flower, never heard of a brown flower, so I couldn’t do that, and decided to leave it with one.

         033

A little Dazzling Diamonds added a little frost to the look.  To get a snowy brick look I just ran a brayer over my EF with Crumb Cake Ink and used Whisper White cardstock.  I think the burlap added a little winter mix to the card layout.  SMILE was cut out with Crumb Cake cardstock and the edges were sponged with Early Espresso Ink.

I kept the inside very simple ~

                      035

A simple post today for a clean and simple card.  I hope it brought a smile to your face.

Tomorrow is a biggie…..it’s the Pals November Hop!!!  I’m sure it will be a big one!!! See you bright and early!

Photobucket

 Photobucket

November 03, 2011

One More Christmas Card

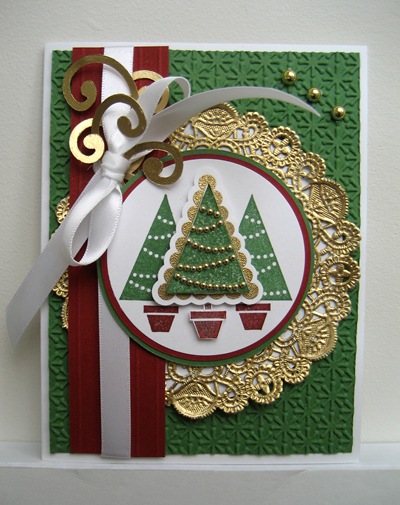
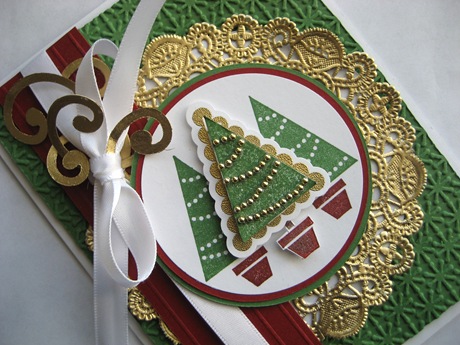
I finally got out my Pennant Parade stamp set and came up with a card.  And of course it had to be a Christmas one! *smile*

        001

I first stamped two trees of the same image side by side.  Then cut out my circle and placed the third tree in the center in between the other two.  On the center tree where the white dots were on the stamped image I placed very small gold flatbacks and popped it all up with dimensionals.  The doily was white, I wanted gold and of course I didn’t have any on hand…I just got out my gold leaf pen and made it gold.  I only colored the outside edges knowing that I would be covering up the inside circle of the doily.  Cherry Cobbler with scored lines provided me with the strip on the left adding a little more bling with the Swirls Scribbles die and Whisper White ribbon.

Here’s looking at it all a little closer ~

003

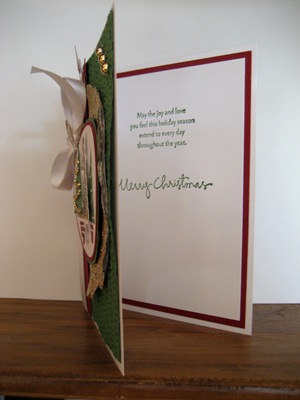
Don’t you just love the new Snow Burst Embossing Folder?  This is probably one of the most busiest cards I have done in awhile, but I liked how it all turned out.  I went lighter on the inside ~

                 013

I hope you enjoyed today’s card.  I certainly have been in the Christmas mode here lately, here’s a sneak peek at Monday’s card.

                           033

It’s a little different – you won’t want to miss it!

Have a great weekend everybody and I’ll be looking forward to seeing you on Monday!

Photobucket

 Photobucket

Related Posts Plugin for WordPress, Blogger...