July 28, 2011

You Always Do The Nicest Things

In part that’s what today’s card is all about.  The other part is I noticed it would qualify for the CHALLENGE over at The Paper Players


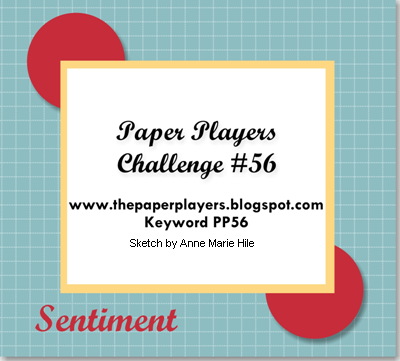
This is their sketch…

...This is my card

        010

I think ‘Thank You’ are one of my most needed cards.  I thought using the Happy Greeting set would say it all.  I began with the beautiful Paisley Petals DSP, snipping out two flowers from two different sheets and mounting one on top of the other.  I omitted the ‘happiness’ from the one stamp, which gave me just the word ‘Always’ for the sentiment on the front.  A few silver flatbacks mixed in with a few rhinestones gave me my bling.

Looking a little closer ~

       003 

From this angle I think you can tell where I added dimensionals for a little extra depth and the placement of the rhinestones around the center of the flower.

Looking inside ~

            007

Another little bit of snipping for the flower inside and another stamp from the same set.  The only thing I could wish for is that the ‘Always’ stamp on the front and the stamp I used inside were in the same font.  Maybe I should not have mentioned that……would you have noticed? *smiles*

Supplies needed ~ All are SU! unless otherwise noted

  • Card stock – W. White, B. Breeze and A. Artichoke
  • Tools – Happy Greeting stamp set and Beautiful Wings die
  • Misc. – Clear EBP, Heat Tool, dimesionals and Basic Rhinestones, silver flatbacks are from my stash

This wraps up another week for me and you know come Monday it’s a whole new month…….AUGUST!  Can’t believe it!  But I can get excited about beginning to make FALL CARDS!! 

HAVE A GREAT WEEKEND AND HAVE FUN STAMPING!

Photobucket

 Photobucket

July 26, 2011

A Masculine Easel Card

Larry and I have a close friend that is undergoing some health issues presently and I wanted to send him a card.  It was a bit of a challenge for me, I think I have only made one other masculine card…ever!

So Phil this is what I made with you in mind, you should be getting it in a couple of days.


       024


I was a little skeptical using the Scallop Circle Die for a guy’s card, I tend to think of butterflies and flowers with scallops.  Now Larry on the other hand he thinks of CLAMS and FISH. *smile*  But I think with the addition of the twine, the tree and using earth tones I accomplished my task.

                  018

I used copics for the coloring of the tree. Then stenciled the edges before removing the spellbinder die.

         022   

For the sentiment I used First Edition DSP, used scallop circles #2 die, attached a button, distressed the edges and simply added his name with my white gel pen.  Nothing to girly here!

A side view ~

                     013

Supplies needed ~ all are SU! unless otherwise noted

  • Card stock – W. Wasabi. E. Espresso, V. Vanilla and First Edition DSP
  • Tools – Lrg. Scallop and Scallop #2 Dies, Lovely As A Tree stamp set, spellbinders and Copics
  • Misc. – Twine and button are from my stash

Hope you liked today’s card as much as I did making it!  Thanks for stopping by for a visit and for taking the time to leave all those lovely comments and emails.  I appreciate each and every one!

Photobucket

 Photobucket

July 25, 2011

You Asked…..I listened

Last week I posted a card that I had used a small 2x2 CB EF on and it brought about several emails asking how I got that crisp clean look.  Here is a reminder of that card ~

                   014

I guess next I’ll be looking into video tutorials *smile*  I think it would have been easier.  I can’t say this tutorial is the BEST but I did my best!

Using the Cuttlebug this is what I did:

             001

On the left is the embossing folder ~ the flower design in the middle measures 1 1/2” x 1 1/2”

I cut a piece of scrap card stock in the same measurements of the flower design, then placed it directly on top of the flower design of the embossing folder and ran it thru the Cuttlebug.  Its important that your scrap piece is no more in size than the design that you want embossed.  Below is what it looks like when you place your scrap piece of card stock on top of the design and this is how you would run it through your Cuttlebug.

             006

Here is one that I ran thru the Cuttlebug without any card stock on top of the design that I wanted to emboss ~

            002

Without ~ See the difference

It is also important to note that every machine is calibrated ever so slightly different.  I used a piece of card stock, I have heard some stampers have to use a piece of cardboard or corkboard.  You have to play around with it and find which works best with your machine.

With the Big Shot ~

             004

Not too bad without the scrap piece, but it really is perfect with it, BUT…

             005

with the Big Shot my scrap piece of paper is only a piece of regular xerox paper….unbelievable, but it does make a difference.

The best I can tell you is trial and error.  You really have to get to know your machine.  With my machine I find MANY times nothing more that a piece of card stock or a plain sheet of copying paper  is plenty for me, anything more and I have a mess.

I hope this helps, I can only share what works for me.  Get out those little embossing folders and give it another try, you might get surprised.  If any of this is clear as mud……you know I am only a click away! *smiles*

I’ll leave you today with a picture of a little feller that was hanging around our front yard for a while it’s checking out my tree and did not mind me taking all the pictures I wanted ~

       deer 016 

Have a great day and as always thank you for visiting!

Photobucket

 Photobucket

July 21, 2011

A Bit of Nature

The Pals Paper Arts are hosting a Sketch Challenge this week and invite you to play along with the sketch they provide that looks like this  ~


I entered a card that looks like this ~

        001

I Choose the colors Early Espresso, Baja Breeze, Crumb Cake and Whisper White with a splash of Always Artichoke.  Most edges were sponged with Early Espresso Ink. 

How do you like my ribbon? *smile* It’s a thin piece of Early Espresso cardstock run through my crimper.  I liked how it turned out…..I see it  saving me money on ribbon.  Now that’s a good thing!

Here’s a closer look !

                  004

I used the Hearts of Heart Die and the Large Heart Punch, stamping one with a stamp from the ‘Charming’ set.  The bird, from the Two Step Bird Punch, was sponged with E. Espresso also along with a mix of red and yellow’s sponged on his chest.

A different angle and viewing the inside  ~

  002003

Supplies needed ~ all are SU! unless otherwise noted

  • Card stock – W. White, B. Breeze, E. Espresso, C. Cake and A. Artichoke
  • Tools – Little Leaves Die, Two Step Bird Punch, MS Fern Punch, Lrg. Heart Punch, Eyelet Border Punch and Crimper
  • Misc. – Twine and flatbacks are from my stash

Upcoming on Monday – A tutorial on how I run my embossing folders through my Big Shot/Cuttlebug without showing those icky little edges of the folder showing on your card…….”you asked and I listened!”  See you on Monday! *smile*

HAVE A GREAT WEEKEND EVERYBODY…..stay cool!
It’s HOT HOT HOT in Maryland!

Photobucket

 Photobucket

July 20, 2011

You’re Tea-riffic

How in this world these stampers come up with the niftiest ideas I will never know, I can’t imagine the brain power it must take to come up with this stuff……DO THEY EVER SLEEP?  I was doing a little blog surfing the other day and came across this CUTE little teapot on Ellen Kemper’s blog.  I immediately thought of this stamp set I had that would have the perfect sentiment for a friend.

Have a look ~

014

How sweet is the teapot!  It is made with your Blossom Petals Builder Punch.  Here is Ellen’s quick and easy tutorial.  I brought out one of my small CB EF for the embossed piece on the right.

Here’s a closer look ~

              015

I tried a little ‘rock-n-roll’ on the butterfly and sentiment.  I used Bashful Blue and Daffodil Delight Inks. 

                   007

The inside brought it all together ~

              013

The inside is faint, but it says …. ‘you’re ‘tea-riffic’ with a teabag just under it.

I hope your day is TEA-RIFFIC!!  I’m entering a PPA CHALLENGE tomorrow and here’s a sneak peek of my card ~

                             017

THANK YOU FOR VISITING TODAY – I enjoyed having you!

Photobucket

 Photobucket

July 19, 2011

One Of My Favorite Flowers

It’s that time of year again for the invasion of sunflowers in this area.  They also are one of my favorites.  Have you ever notice when these flowers are in full bloom, the flower heads all face in the same direction, never one this way and one that way.  Everyone of them….like soldiers in attention ready to march. 

This card represents one of those ready to march ~

        006

I purchased this flower from a fellow stamper Heartwarmers from Vicki she has this amazing little store filled with the best little goodies.  If you have the time, you should stop by to visit her and tell her I sent you. *smile*

The flower was large enough that I felt it did not need a lot of anything else.  I framed it with two things:

  • the Oval Scallop Frame
  • and Gracie's Frame by CB ... I especially liked how this one turned out using only half of it.  Now there’s something different.

The scallop border is by Sizzix and DSP is Bo Bunny.  Button and those gold flatbacks are from my stash.

A closer look ~

     003

I cut a thin strip of Daffodil Delight and ran it through my button holes and curled them with my skewer.  Flower and stem are colored with copics.  The white dots in the center were made with my gel pen.

Looking inside ~

               005

This time the CB folder completed the entire inside with the addition of a K&Company butterfly.

Thanks for visiting me today, as always I enjoyed having you.  Here’s a little peek for what’s in store for tomorrow. *smile*

                          015

Photobucket

 Photobucket

July 17, 2011

A Little Christmas in July

I would like to thank the phenomenal Mary Fish for offering me this opportunity to be a Sunday Guest Stamper on her blog.  I sincerely appreciate her kindness and generosity. 

For today’s card I wanted to portray clean and simple with a dash of elegance, quick and easy and only one layer…hmmmm, a tall order!  But I think I did it……hope you agree.

       012

I began with the Fabulous Florets stamp set.  I loved the foundation of the flower (greenery) but the flower with this stamp set was NOT a poinsettia.  I went to my Blossoms Petal Builder punch and that didn’t work either, even the smallest petal was too large.

The end resulted in digging through my stash of punches and found a couple McGill punches that filled the order.  Here is a picture of how that went ~

  • To begin with you need the Star Lily and Crystal punches by McGill.
  • After punching the eight petals of the Star Lily, sponge the edges of each petal with Cherry Cobbler Ink.
  • With your stylus cup each petal on your pad that comes with your Mat Pack.
  • Punch one of the Crystal punch and with your TomBow glue (absolutely amazing stuff) attached one petal to each prong. 
  • And that’s it!  A video by McGill can be found HERE that can help you with all the info needed to make this flower.  Just keep in mind you DO NOT need all of those ‘McGill’ accessories.  Use your Stampin’ Up ones.  Also I DID NOT ‘pinch or bend’ my petals, I only sponged the edges and cupped them.  Easy…..trust me!

027

Here is a closer look at the flower ~

                 013

And from another angle – I mounted the flower with glue dots

                        015

About that sentiment, I stamped it in VersaMark then heat embossed it with Gold EP.  Did you notice something missing?  Oh yeah, where’s the ‘into your heart’?

It’s on the inside ~

                    011

This just may be my Christmas card this year. *smile*

Supplies needed ~ all are SU! unless otherwise noted

  • Card Stock – W. White, R. Red and G. Green
  • Tools – C. Cobbler and G. Green Inks, VersaMark and Gold EP, and Fabulous Florets stamp set
  • Misc. – McGill punches

Hope you enjoyed today’s card as much as I did making it.  Thanks for taking the time to stop in for a closer look and hope you’ll come back soon.

Hope your Sunday is an AWESOME one!

Photobucket

 Photobucket

July 14, 2011

Summertime and the Livin’ is Easy

That’s the PPA 102 - Challenge this week at the Pals Paper Arts.  With that thought in mind I would automatically think of a hammock and a tall glass of lemonade.  BUT, some would automatically think ‘GOLF’.  I have a couple of dear friends who would live on a golf course if they could! *smiling*  They are adamant golfers and from what I hear, their very good.  I made this entry card with them in mind.

     017

I was trying to portray the golf ball making it across the sand trap and straight into the hole.  i.e. the little dots (made with my Mat Pack) coming in from the upper right side of the card.  Sentiment, as always, stamped then heat embossed with clear EP.

Here’s a closer look ~

         024

BTW….See those little foot prints in the sand trap?  That’s me, just a reminder to them where I would be…..toes in the sand!  Edges on the sand trap were sponged with Early Espresso Ink.

The 18th hole flag was made from a stamp in the ‘Pennant Parade” set.  This is such an awesome set – a must have!  Check it out – page 69 of the IB&C.

For the inside ~

                     021

Par and under every time….??? not sure but I think so!  Sounded good to me!  This part is computer generated…except for the golf ball and tee.

Supplies needed ~ All are SU!

  • Card stock – W. White, E. Espresso, R. Red, G. Green, B. Gray and Black, B. Blue, and Naturals Ivory
  • Tools – Circle punch, Mat Pack, and foot print purchased from $1 bin, Polka Dot EF
  • Stamps and Inks – Pennant Parade and Happy Greeting, B. Blue, White EP, E. Espresso Inks.

That’s it for another Thursday….before you know it July will be gone!

 Sunday I will be a Guest Stamper on Mary Fish’s blog – CHECK ME OUT!  I a little Christmas in July *smile*

Thanks for stopping by today or ANY day!!

Photobucket

 Photobucket

Related Posts Plugin for WordPress, Blogger...